Wiring Diagrams and s

Wire bathroom fan and light to one switch – Hey guys, in this segment, we’re going to tackle the nitty-gritty of wiring a bathroom fan and light to one switch. It’s not rocket science, but it does require some basic electrical knowledge and a bit of patience. So, grab your tools and let’s get started!
Yo, so you’re tryna wire your bathroom fan and light to the same switch, right? Cool. But hold up, before you do that, let’s talk about flexible or rigid duct for bathroom fan. Yeah, it matters, dude. It’ll affect how well your fan works.
Once you’ve got that sorted, then you can go back to wiring that fan and light to one switch. Boom, problem solved!
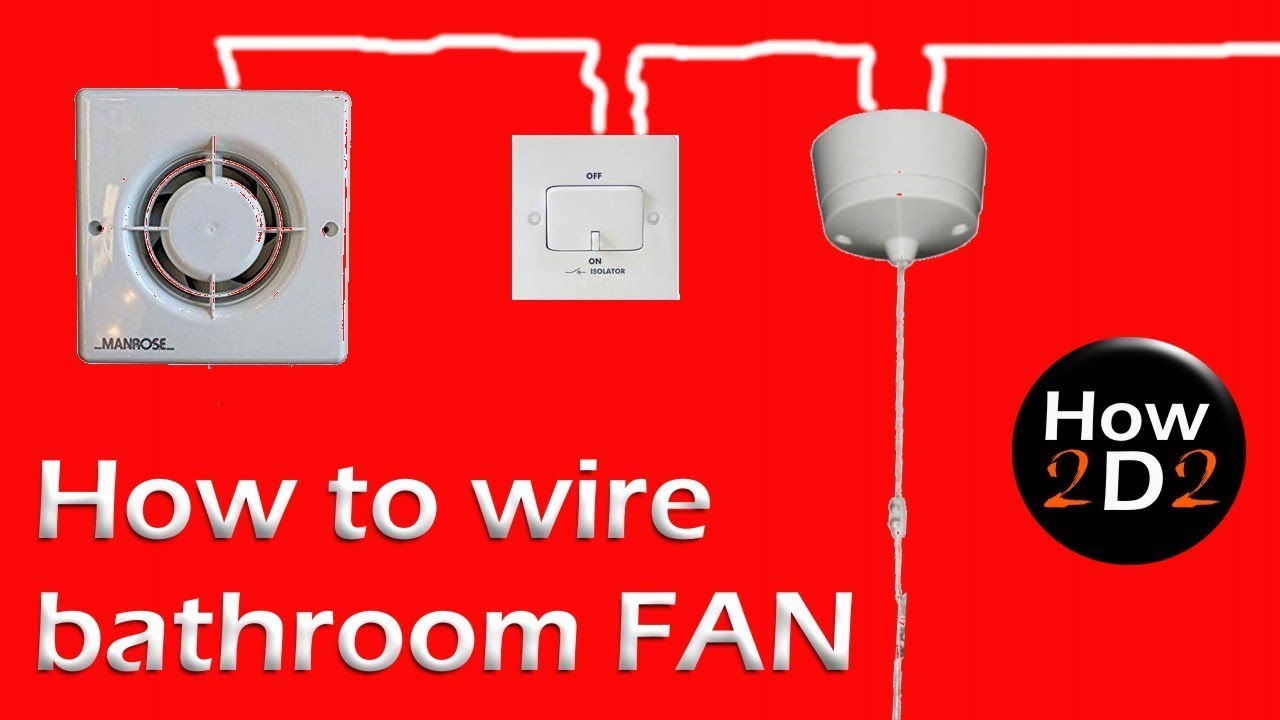
Before we dive into the step-by-step guide, let’s take a moment to understand the basic wiring diagram. We’ll be using a single-pole switch to control both the fan and the light. The switch will have two terminals, one for the power supply and one for the load (the fan and light).
The power supply wire (usually black) will be connected to the power terminal on the switch. From the other terminal on the switch, we’ll run two wires, one to the fan and one to the light. The wire to the fan (usually red) will be connected to the power terminal on the fan, and the wire to the light (usually white) will be connected to the power terminal on the light.
In addition to the power wires, we’ll also need to connect the ground wires (usually green or bare copper) from the fan and the light to the ground terminal on the switch. This will ensure that the fan and light are properly grounded and safe to use.
Wiring a bathroom fan and light to one switch can be a tricky task, but with a little help from a home interior designer near me , it can be done in no time. A professional designer can help you choose the right fan and light for your bathroom, and they can also help you with the wiring.
Once you have the right materials, wiring a bathroom fan and light to one switch is a relatively simple process.
Wiring s
- Turn off the power to the bathroom at the circuit breaker or fuse box.
- Remove the faceplate from the switch and unscrew the switch from the electrical box.
- Connect the power supply wire (usually black) to the power terminal on the switch.
- Connect one wire (usually red) from the other terminal on the switch to the power terminal on the fan.
- Connect the other wire (usually white) from the other terminal on the switch to the power terminal on the light.
- Connect the ground wires (usually green or bare copper) from the fan and the light to the ground terminal on the switch.
- Screw the switch back into the electrical box and replace the faceplate.
- Turn on the power to the bathroom at the circuit breaker or fuse box.
- Test the fan and light to make sure they are working properly.
Electrical Safety Considerations: Wire Bathroom Fan And Light To One Switch

When working with electricity, safety should always be the top priority. Wiring a bathroom fan and light is no exception. Electrical hazards can be potentially dangerous, so it’s crucial to take necessary precautions to prevent accidents.
There are several potential hazards to be aware of when wiring a bathroom fan and light. These include:
- Electrical shock: This can occur if you come into contact with live wires.
- Electrical fires: These can be caused by faulty wiring or overloading circuits.
- Arc flashes: These are dangerous electrical explosions that can occur when there is a short circuit.
To avoid these hazards, it’s important to follow these safety tips:
- Always turn off the power at the circuit breaker before starting any electrical work.
- Use insulated tools and wear rubber gloves to protect yourself from electrical shock.
- Make sure all connections are tight and secure to prevent arcing.
- Never overload circuits by connecting too many devices to one outlet.
- If you are not comfortable working with electricity, it’s best to hire a qualified electrician to do the job.
Tools and Materials Required
To embark on this wiring expedition, you’ll need an arsenal of tools and materials, each playing a pivotal role in ensuring a safe and efficient installation.
Let’s delve into the essentials:
Electrical Tools, Wire bathroom fan and light to one switch
- Wire strippers: These handy gadgets remove insulation from wires with precision, preventing nicks and cuts that could compromise electrical safety.
- Electrical tape: The electrical tape serves as an insulating shield, protecting wire connections from short circuits and other electrical hazards.
- Voltage tester: A voltage tester is crucial for verifying that wires are not live before you start working, preventing accidental shocks.
- Screwdriver set: A set of screwdrivers, both flathead and Phillips, is essential for securing wires and electrical components.
- Pliers: Pliers provide a firm grip for bending and shaping wires, ensuring secure connections.
Materials
- Electrical wire: The electrical wire is the backbone of your wiring system, carrying electrical current to the fan and light.
- Wire nuts: Wire nuts are used to connect multiple wires together, providing a secure and insulated junction.
- Electrical box: The electrical box houses the wire connections, providing a safe and enclosed space for electrical components.
- Switch: The switch controls the flow of electricity to the fan and light, allowing you to turn them on and off.
- Faceplate: The faceplate provides a finished look to the switch, covering the electrical box and adding an aesthetic touch.
